How to Keep Calla Lily Bulbs in Winter for Next Year
Calla lily tend to be white is hardy varieties. They are going to survive overwintering outdoors in many climates. Usually, more tender varieties are colored and may not overwinter. For this reason, lots of gardeners keep Calla bulbs in winter for next year.
Keeping Calla Lily Bulbs in Winter for Next Year
Apparently, there are some methods you can do to keep Calla Lily bulbs in winter for next year.
Method 1: Overwintering Calla Lilies Indoors
- Taking out Calla Lily bulbs from the soil to overwinter them indoors is the first thing you need to be consider. Usually, Calla Lily bulbs prefer a warm climate. Please cut the withered foliage back to 3 inches above ground level.
- After that, dig up the Calla Lily bulb carefully. It contains all the essential nutrients which help Calla Lily to survive in winter. Please be sure to dig a much wider hole than you think you need to. Doing this will assist you avoid damaging the bulb with your spade.
- Now, remove the soil from the Calla Lily bulb gently without damaging the roots. Please cut off the dead foliage, leaving about two inches of dead leaves on the rhizome. To remove the rest of the soil, rinse the bulbs under cool running water.
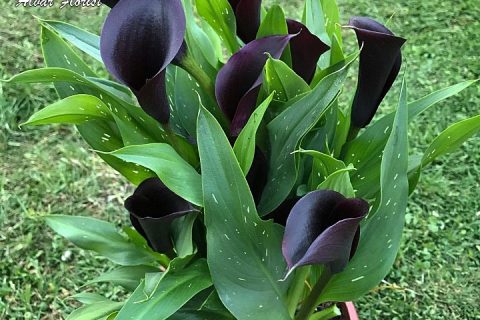
Read more: Does Calla Lily Black Really Exist and How to Care for
- You have to check your rhizomes carefully for rot or any signs of disease. It is not worth keeping any rhizomes that are damaged.
- Please put the rhizomes on a tray. You have to let them dry for a few days. They should be spaced well to allow air to circulate between them. An ideal temperature for rhizome storage is 60 to 70 degrees F.
- Next, you have to put your rhizomes into paper bags. After they have already dried out for a few days, wrap the rhizomes in paper bags or newspapers. Do not forget to put a small amount of dry peat moss or vermiculite inside. This will assist to prevent one Calla Lily bulb from infecting another if it develops mold. Also, you are able to use a cardboard box if you make several ventilation holes to let air circulate. Avoid letting the Calla Lily bulbs touch each other. Put moss or vermiculite between them.
- Remember that damp and rot are the biggest problems with overwintering rhizomes. So, keep rhizomes dry where possible and store them in a dark and dry place. But, they should not dry out completely. If the bulbs appear dry, a light mist with a water spray should prevent them from drying out too much.
- Give your Calla Lily rhizomes time to recover before you replant them. They need to rest for a few months before growing again. Please plant them in middle or late spring after the threat of frost has passed and the ground is warmer.
- You have to consider keeping your Calla in a pot. You are able to plant Calla lily outside in a pot and move it inside for the winter. When planting it, you need to use decent-quality compost and ensure the pot has good drainage holes. Please plant the rhizomes with the eyes upwards so that they are only visible in the soil. After flowering ends, you are able to feed the pot with a potassium-rich fertilizer. Move the pot to a cool dark area after the foliage withers away and stop watering your Calla lily for three months and avoid cutting the foliage until it has withered away.
Method 2: Overwintering Callas Outside
- You are able to consider keeping your Calla Lilies outside if you live in a mild climate. Calla Lilies are going to survive outdoors over winter in mild climates that do not experience much snow, deep freezes and heavy prolonged rainfall. Usually, they are able to cope outdoors through winter in zones 8 through 10. It means that they will be able to survive in temperatures which do not drop below 30 to 35 degrees F.
- Now, you have to help your plant to die back. After flowering has ended, do not water and allow your Calla Lily to die back. You have to try to refrain from cutting the foliage until it has withered away.
- Please give your Calla Lilies some protection. If you are overwintering outdoors, you have to apply a mulch of about four inches of straw or evergreen branches. Also, you are able to put them under an upturned pot or cloche. We highly suggest you do this in the fall before the ground gets cold.
Method 3: Replanting Overwintered Calla Lilies
- Make sure that there will not be any more frost before you are going to plant your Calla lily. You have to wait until all the threat of frost has passed, and the soil has had an opportunity to heat up a little before planting the rhizomes outside again. Usually, middle spring is a good time to move them outside again
- You have to select a well-drained spot in a sunny position. Remember that if you cannot discover a super sunny spot, Calla Lilies are going to tolerate shade for part of the day. It is a nice idea to incorporate some well-rotted manure or compost into the soil to boost it ahead of planting. A rich soil will assist the plant produce flowers.
- Now, plant your rhizome correctly. Keep in mind that the rhizome should be planted with the eyes facing upward and only visible at the top of the soil. Please leave around 12 inches of space between each of your rhizomes. After they are in the ground, just give them a good soaking and then continue to keep the soil moist, but not waterlogged when they grow.
- Please water your Calla lilies. Calla Lilies need water throughout the summer. If you dig them up for overwintering indoors, they are going to need extra water when they get established back in the ground. Do not forget to feed fortnightly during the growing period, but stop feeding ground-planted Calla lilies when flowering begins. Continue feeding your Calla Lilies throughout the flowering period.
- Lastly, you have to watch out for pests. Generally, Calla Lilies are trouble-free but can suffer from pest attacks by whiteflies or aphids. For this case, keep an eye out for the pests and spray as needed with an all-purpose bug spray.


Leave a Reply