How to Propagate Morning Glory Tree
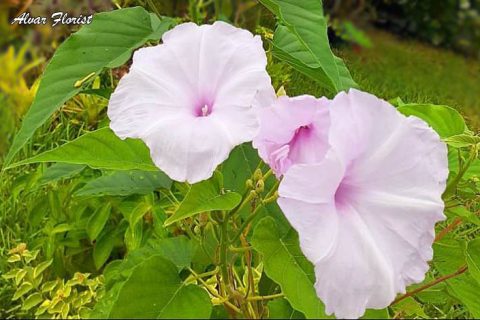
For everyone who is thinking of turning your garden into the one that is full of morning glories, you might need the information about the morning glory tree propagation. Before continuing reading the post, it is better for you to prepare a piece of paper to take some notes.
Apparently, the seeds are the best way to propagate morning glory. When you start morning glories from the seed, it can take 2 ½ to 3 ½ months before they start blooming. In the places that are known for the cold winters and shorter growing seasons like in the northern areas, before the last frost date is the best to start to grow morning glories from the seed but indoors first for 4 to 6 weeks.

You are able to use a file to cut the hard coating of the seeds during the process of germinating the seeds. Then, soak these seeds in the water for 24 hours. The next day, it is time for you to soak the seeds ¼ inch or 6 mm deep in the fertile soil. This method is effective to help the seeds to take up water. Not only that, it is also such a good step to help them germinate quickly.
For your information, germination time for morning glories averages 4 to 7 days at the temperature of 65 to 85 degrees Fahrenheit or at 18 to 29 degrees Celsius. It is important to keep the moisture of the soil moist. Remember to not make it soggy while germinating. The seeds of morning glory are known to be toxic. It is the reason why it is needed for you to keep these seeds away from the children and pets, including the seed packets, the ones that are soaking and the ones that are planted in trays.
If you want to seed the morning glories in the ground, you can do it once the danger of frost has passed and when the temperature of the ground is about 65 degrees Fahrenheit or 18 degrees Celsius. Due to the fact that morning glories grow well in the place that gets enough full sunlight, please choose the place well. Aside from that, it is also important to pick the one with good drainage and is close to a vertical surface so that the vines can climb. These plants usually do well when there are fences, railings, archways, pergolas, and trellises.
If you are thinking of growing the morning glories outside your home, the first thing that you need to do is to cut and then soak the seeds. Take note to water these seeds thoroughly. It is time for you to thin the seedlings the moment the seeds are sprouted. Do not forget to space morning glories 6 inches or 15 cm apart in all directions. It is also important to keep the flowerbed watered and weeded and it should be done until the young plants are established.
Before planting the morning glory seeds or transplanting the seedlings, you are suggested to work on compost or aged animal manure into the ground as they are the best nutrients provider. In addition, they are also effective to keep the moisture of the soil. If you want to feed them the fertilizer, you are actually allowed to do so as long as the one that is used is designed for flowers and as long as you apply it according to the guidelines of the manufacturer. Do not ever think of feeding too much fertilizer as it can produce more leaves instead of flowers. In order to keep the moisture of the soil, you can also use mulch. Not only that, it is also able to be used to control weeds.
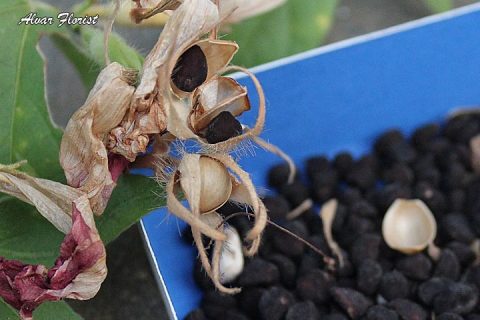
While it is true that morning glories grow as perennials in USDA hardiness zones 10 and 11, in the areas with colder temperatures, they are able to be treated as annuals. The seeds of the morning glory are known to form in pods and they are all able to be gathered and saved. As a gardener or the one who loves to grow morning glories, you can let the seeds drop for self seeding instead of planting them each year. However, it should be noted that there is a possibility of the flowering to be in the next season and the seeds are able to spread to the other areas of the garden. If you find this situation problematic, the best thing that you can do is to kill the spent flowers before there is a chance for them to form seed pods.
Propagation is the most favorite thing for those who have pretty plants that produce pretty flowers or foliage and want to have more. The term propagation means creating new plants from existing plants. This one includes saving and sowing seeds or digging and dividing the root or bulb clumps. Talking about propagation, the best and the easiest way is still cutting a stem from the parent plant and then planting it into the soil to grow a new plant.
In general, the process of propagation is simple. All the things that you need include the sharp scissors or snips, potting soil and a 4 inch pot, and rooting hormone powder. If you have no idea where to get the powder, you can lurk around in stores or online.
Before you start the process of planting, it is worth noting that a few plants are protected by patents. The statement means there are some plants that cannot be propagated. The breeders of the plant have worked so hard to create special varieties of plants and they obviously deserve the reward for their work. You are encouraged to tag on the original plant just in case the propagation is prohibited. Besides, you can also Google search for the name of the plant variety for this case. Please do some research to avoid unnecessary things. Staying away from the problem and staying true is always better in every situation.


2 comments